Welcome

Red Bucket Farm is an urban farm on a quarter acre property in an average residential neighborhood. We are located in Wisconsin, USDA Zone 5. We focus on chickens, bees, orchard fruit, and raised garden beds for fruits and veggies. We hope to reduce our footprint on the planet by growing some of our food, reducing our use of fossil fuels, and gardening with sustainable practices. Thanks for visiting!

Showing posts with label homebrew. Show all posts

Sunday, July 27, 2014

Infused Vodka


Fruit infused vodkas are growing in popularity. They're fun and easy to make and almost too easy to drink. Last fall I made my first attempt at infused vodka with cranberries, which we thought was delicious. This summer the currants have been so plentiful that we experimented with currant infused vodka. In the photo above, the glass on the left contains red currant infused vodka; the glass on the right has black currant infused vodka.


You don't need to be a farmer to try this project. Begin with two cups of fruit in a medium sauce pan. I added a half cup of sugar to my tart currants and cranberries. Cook over low heat until the skins just begin to pop. Pour the fruit mixture into a large jar. Add four cups of cheap vodka. Wait for two weeks, then strain and serve.

If I wanted to make raspberry, strawberry or peach infused vodka, I would stir only a few tablespoons of sugar into the fruit and let it rest for 15 minutes (without cooking) before adding the vodka.

My Jewish friends tell me this is known as vishnyak or vishniak in Yiddish culture. We enjoy our vishnyak over ice or just neat in small cordial glasses. Be careful---it's not kool-aid.

Wednesday, January 22, 2014

Cranberry Vodka


Here is something to warm those cold January evenings: cranberry infused vodka.

Simmer 12 oz cranberries with 1/2 cup sugar, 2 tablespoons water, and a little nutmeg until the sugar is dissolved and some of the cranberries are popped. Cool slightly and transfer to two quart jars or a half-gallon jar. Add 750 milliliters vodka. Store in a dark place for two weeks, turning the jar occasionally. Strain and serve.

How is this related to urban farming? I found the recipe in the Nov/Dec 2011 issue of Urban Farm magazine. For medicinal purposes only, of course!

Tuesday, October 1, 2013

Harvest Totals

I haven't posted about our successful harvests because I was afraid it would sound like bragging---and Heaven knows that bragging is one of the seven deadly sins. Nevertheless, I want to tell you about it as inspiration for your own gardens. Remember that Red Bucket Farm is just my backyard in an average 1970s neighborhood with less than a quarter acre property including the house. You can do this, too.

Harvesting began in June with a lovely supply of currants and strawberries. I made the currants into jam and sauce. Some of the strawberries became jam and others were frozen. In July we harvested cherries from three cherry trees. We made a few pies and have several bags of cherries in the freezer.


The summer raspberries produced nicely, too, some of which became jam, some frozen, and plenty of them enjoyed fresh. The blueberry bushes are coming along, and we were able to freeze a few for winter use. Our peach tree did very well---90 pounds of peaches! My freezer and canning shelves are full---jam, peach rum sauce, spiced honey peaches, peaches in light honey syrup, and plain frozen peach slices (for pie later on).

In July we harvested honey from our one surviving hive. We made mead and strawberry melomel (a fruity mead variation). Honey is shelf stable and will last the winter.


Vegetables in raised beds have also done well. I harvested 50 pounds of potatoes and 50 pounds of onions in early August, and immediately replanted those beds with spinach, arugula, Swiss chard and beets. We'll hoop those beds to stretch the growing season through November. The butternut squash have exceeded 60 pounds, and there are still more growing on the vines.

This year the tomatoes have outdone themselves. I grow only six Amish paste tomato plants and I have enough tomato products to keep us until next year----plain tomato sauce, pizza sauce, tomato paste, and two kinds of salsa. I'm not kidding---only six tomato plants and they're still producing. Green beans continue to produce into the fall. We have dilled beans and frozen beans to last the winter.

What have I forgotten? Lots of basil/pesto, herbs, carrots, beets, scallions, and garlic. Fall bearing raspberries are awesome!

You can do it, too. If there is a secret to successful gardening, it's not a very well-kept secret: sunshine and compost. Start planning for next year's garden!

Saturday, August 17, 2013

Hops Harvest


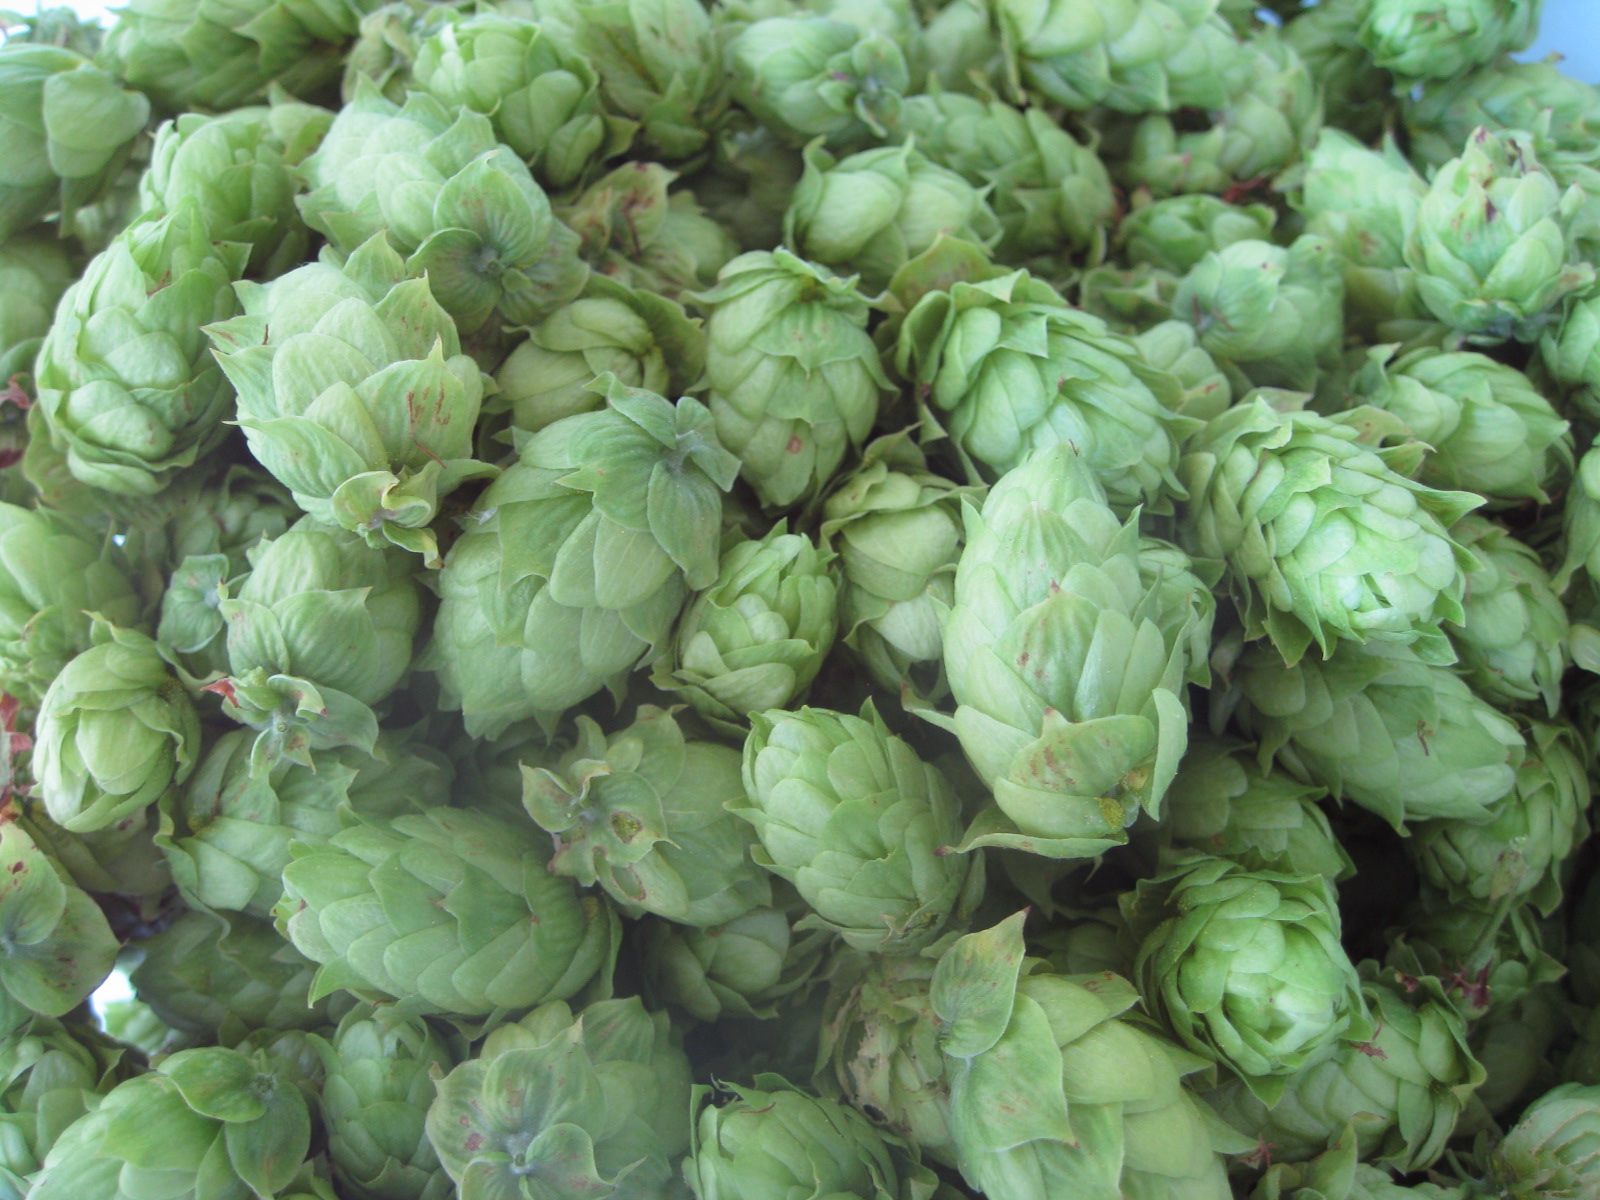
Harvesting hops is my favorite garden "chore." We sit on the patio drinking iced coffee and listening to good music while picking hops off the bine. It's relaxing and smells fabulous!


We grow three kinds of hops here at Red Bucket Farm---Cascade, Willamette and Nugget. Hops bines (not vines) twist around a taut twine on our 12' tall hops towers. This morning our resident brewer climbed the orchard ladder and cut down the twines and bines.


We harvested 12 ounces of Cascade hops and 2 ounces of Willamette. (The Nugget hops aren't quite ready for harvesting.) Although it doesn't seem like very much, the Cascade hops filled one bucket to the brim. It's more than enough for a batch of pale ale, which is in the works as I write this. We'll store a few ounces of the Cascade hops in the fridge for a week to serve as the "finishing" hops for the India pale ale. Any remaining hops will be dried and frozen for future use.


Thursday, December 6, 2012

Carrots--Storage & Menu


In September and early October, I harvested a ridiculous amount of carrots---around 55 pounds. These aren't picture-perfect long slender carrots. Most of them are gnarly and twisted, which is clearly my fault for not having thinned out the seedlings properly. In fact, I intentionally planted them in bunches based on a gardening tip that I had read. Since I'm not selling produce, it doesn't matter to me what shape the carrots take. These carrots are delicious and sweet.

We've experimented with long term storage of the carrots. Our best method so far is simple. We store them in zip-lock bags inside the refrigerator. Our extra fridge is kept warmer than our primary fridge, mostly for storing root vegetables and home brewed beer and cider. It's important to prevent the carrots from dehydrating without simultaneously molding the squash and onions. Hence, we use zip-lock bags.


We've gotten creative with carrots recipes: carrot cake, braised and glazed carrots, mashed carrots with garlicky yogurt. We add carrots to soups, omelets, and stir fries. Yesterday I made sweet carrot pie, which is similar to pumpkin pie. I should probably look for that carrot jam recipe, too.  I think it's important to remember that slightly deformed vegetables taste perfectly fine and don't need to be recycled to the compost pile.

Tuesday, September 4, 2012

Harvesting Hops


Our curiosity in growing hops at Red Bucket Farm is new. We began brewing beer in late 2011, which led to an interest in growing hops this summer.

We started brewing by purchasing an equipment kit (ale pail, carboy, siphon, capping device, etc) and an ingredient kit (grains, malt, yeast, hops). By following the directions and paying attention to detail, it's not too difficult to make very drinkable beverages. Brewing beer from kits is similar to making brownies from a boxed mix. It's easy and fun, but eventually you might want to try a recipe of your own. Growing hops made sense to us and seemed like part of the brewing adventure.


Hops are a perennial vine that flower in the late summer. They can grow twenty feet tall in one season and need sturdy structure. Pictured in the photo above are two of our three hops towers just after planting in July. We established three varieties---Cascade, Willamette, and Nugget---each in their own raised bed with a 12 foot tower. As the vines grew, we encouraged the strongest to attach to twine and clipped out the weak vines. Hops grow best in full sunshine.


At the end of the summer, all three of our hops plants produced flowers from which beer gets its aroma, flavor and distinctive bitterness. We carefully cut down the twine supporting the vines and pulled the flowers gently off the vine.


The flowers were dried in a 120 degree oven and then weighed for use. Our resident brew master refrigerated the flowers overnight and cooked up a wort the next day. It's percolating in the basement now.

We're pleasantly surprised that the vines were productive in their first year of growth. The plants will die back to the ground over winter. Next summer should produce a much bigger crop as the vines become more established.


Hops also have antiseptic qualities. I read that they're good for chicken health, so perhaps we'll have enough to share with the flock next summer. Meanwhile, Al the Cat (above) is having a small taste. Cheers!

Tuesday, November 8, 2011

Making Hard Cider


I've been vaguely interested in home brewing for years, but only as the willing sampler of another person's handiwork. Somehow, the jumbo-sized cooking pots, fermenting pails and extra equipment seemed overwhelming to me. But a small article in a recent issue of Mother Earth News magazine brought hard cider to my attention, and I began researching this ancient beverage. Did you know that hard cider was the most popular American beverage prior to Prohibition? Also, did you know that in Europe, all cider is hard (alcoholic) cider unless specified as sweet cider?

My first reference for making cider was www.makinghardcider.com. The author of this website describes the whole process in great detail, so I won't need to repeat it. I also purchased a book called Strong Waters by Scott Mansfield, who advocates making one-gallon batches of homemade beer, wine and cider. Creating small batches has allowed me to make three different blends of cider in a few weeks. The equipment set-up has been minimal, the learning curve is quick, and mistakes are less expensive. Besides, now I can choose from different spirited beverages for my late evening popcorn and beer routine.


The process for making hard cider is simple. Purchase a gallon of pasteurized cider in a glass jug. You'll use the jug as your fermenter. Choose cider with no preservatives, which will kill the yeast. Add 3/4 cup of sugar and a little champagne yeast. A teaspoon of yeast nutrient will help. Shake it all up in the jug and then cover it with a bung (rubber stopper with a hole in it) and an airlock. These supplies are cheap and readily available at your local brew shop. The yeast eats the sugars in the cider and causes fermentation. It's fun to watch the bubbles rising to the top, but I cover my jug most of the time with dark fabric because light can damage the final product. Fermentation is finished in a week, and then I bottle the cider into beer bottles with a teaspoon dextrose for carbonation. The cider will get a little better with time, so wait a week or two before enjoying.