Welcome

Red Bucket Farm is an urban farm on a quarter acre property in an average residential neighborhood. We are located in Wisconsin, USDA Zone 5. We focus on chickens, bees, orchard fruit, and raised garden beds for fruits and veggies. We hope to reduce our footprint on the planet by growing some of our food, reducing our use of fossil fuels, and gardening with sustainable practices. Thanks for visiting!

Showing posts with label kitchen/menu. Show all posts

Saturday, July 9, 2016

Colorful Beets

In my opinion, the first rule of gardening is grow what you like to eat. And since I love beets, I'm growing three different varieties this summer: Burpee's Golden, Albino, and Cylindra.


I start beet seeds in four inch pots, sowing several seeds in each container. When the seedlings are a couple inches tall, I transfer the entire bunch outdoors into a raised bed. When I harvest, I pull out one clump of beets at a time. I have more beet seedlings in the greenhouse ready to move outside as space allows. I know this isn't the "normal" way of sowing beets, but it seems to work for me.


Peeling raw beets is challenging especially if they are small. I prefer to boil them until they're soft, and then the skins slip off easily with finger pressure. The photo above shows Albino and Golden beets just after peeling.


Last night we enjoyed Cylindra beets, which are deep red-purple, served simply with butter and salt (shown above). We also prepared the stems and leafy greens, sauteed lightly in olive oil and dressed with balsamic vinegar.


Tonight's menu leans toward Asian-style cooking. I've prepared a mix of golden and albino beets along with Oxheart carrots. They're marinating in a ginger-soy dressing, ready to serve in an hour or two. I love how beets are adaptable to various cooking styles.

Fun fact: beets make your pee turn awesome colors. I was just checking to see if anybody actually reads to the end. Happy cooking!


Sunday, July 27, 2014

Infused Vodka


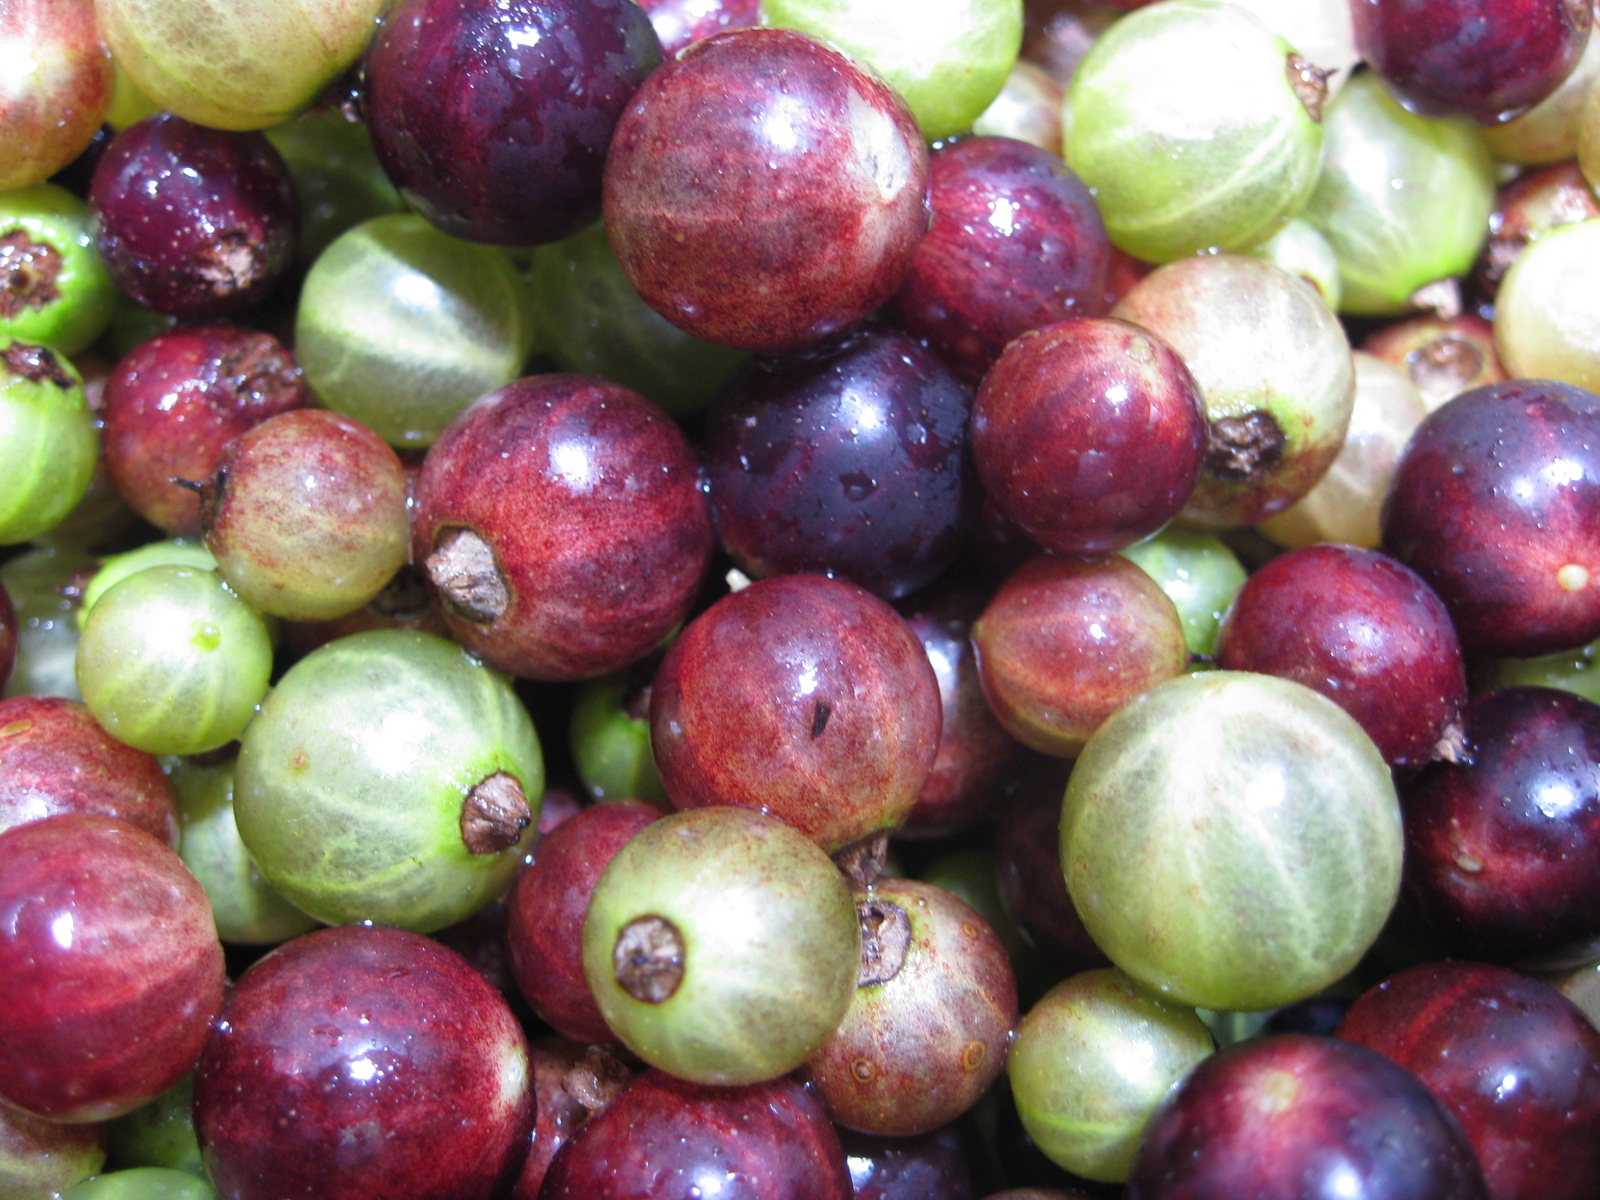
Fruit infused vodkas are growing in popularity. They're fun and easy to make and almost too easy to drink. Last fall I made my first attempt at infused vodka with cranberries, which we thought was delicious. This summer the currants have been so plentiful that we experimented with currant infused vodka. In the photo above, the glass on the left contains red currant infused vodka; the glass on the right has black currant infused vodka.


You don't need to be a farmer to try this project. Begin with two cups of fruit in a medium sauce pan. I added a half cup of sugar to my tart currants and cranberries. Cook over low heat until the skins just begin to pop. Pour the fruit mixture into a large jar. Add four cups of cheap vodka. Wait for two weeks, then strain and serve.

If I wanted to make raspberry, strawberry or peach infused vodka, I would stir only a few tablespoons of sugar into the fruit and let it rest for 15 minutes (without cooking) before adding the vodka.

My Jewish friends tell me this is known as vishnyak or vishniak in Yiddish culture. We enjoy our vishnyak over ice or just neat in small cordial glasses. Be careful---it's not kool-aid.

Wednesday, March 5, 2014

Ginger Lemonade


Are you suffering from late winter creeping crud? Here's an easy recipe that will sooth a scratchy throat.

Ginger Lemonade

6. cups water
1 cup sugar
1 cup bottled lemon juice
ginger 

Combine all ingredients in a pot, simmer and steep. Simple!

I use a variety of ginger. You can buy crystallized ginger in little bags (shown above). If you feel ambitious, you can buy fresh ginger root and grate it yourself. We buy grated ginger in small jars, found in the ethnic section of the grocery store. We also just discovered a jar of dried ginger slices from Penzeys in the back of our cabinet. I suppose you could even use dried ginger powder.

Any unused portions can be stored in the refrigerator and reheated later. Try it!

Wednesday, January 22, 2014

Cranberry Vodka


Here is something to warm those cold January evenings: cranberry infused vodka.

Simmer 12 oz cranberries with 1/2 cup sugar, 2 tablespoons water, and a little nutmeg until the sugar is dissolved and some of the cranberries are popped. Cool slightly and transfer to two quart jars or a half-gallon jar. Add 750 milliliters vodka. Store in a dark place for two weeks, turning the jar occasionally. Strain and serve.

How is this related to urban farming? I found the recipe in the Nov/Dec 2011 issue of Urban Farm magazine. For medicinal purposes only, of course!

Thursday, October 3, 2013

Who Cooks for You?

In many parts of the world, family units have one person whose full-time job is to prepare food for the family. This person rises early in the morning to make breakfast. After cleaning up, they head to the market to purchase food ingredients for the rest of the day's meals. It's not always a woman who does this work. We knew an exchange student from China who revealed that her retired grandfather did all the kitchen work.


By stark contrast, Americans have made an entire industry out of convenience foods. We've also seen an abrupt increase in obesity, diabetes, cancer, autism, allergies and more. Coincidence?

America's dependence on convenience food goes way beyond an occasional visit to a fast food restaurant. Food celebrities have published dozens of 30-minute meal cookbooks and they all include canned, packaged and pre-cooked items. How many of us make our own stock or boil our own legumes?  How easy is it to make salad dressing or popcorn? Yet even a 30-minute homemade meal is better than a frozen box of chicken pot pie or a can of soup.

So who cooks for you? Kraft? Pillsbury? Annie's Organics? And why does America no longer value the home cook?

Monday, July 8, 2013

Canning vs. Freezing

It rained a record-setting eleven inches in the month of June at Red Bucket Farm, which seems to have pleased our fruit bearing plants, bushes and trees. In the last few weeks, we've harvested many pounds of strawberries, rhubarb, currants and cherries. The raspberries, blueberries and tomatoes are just beginning to ripen, which will be followed by peaches and more vegetables.

What do we do with all the harvest? Our free-standing freezer is modest in size, so we follow the advice of our friend Lynn who says, "Can what you can and freeze what you can't." So far we have canned strawberry jam, apricot jam, rhubarb-currant jam, and currant sauce (for pancakes, ice cream, etc).  We've frozen sour pie cherries, sliced strawberries and strawberry puree (for smoothies).

It concerns me that home canning has a reputation of being difficult and arduous. The whole process is rather simple. The main concept is to pour piping hot food into boiling hot jars, tighten the lids and simmer them for a few minutes. As they cool, the lid seals with a pop. That's it. The equipment is affordable and readily available---a few canning jars and lids, a large soup pot for cooking the food, one large canning pot for boiling the jars. A few tools are helpful, like a canning funnel, a jar lifter, a ladle. Keep it simple.


Let's take today as an example. I picked black currants this morning, separated them from their tiny vines and stems, and washed them. (Then I took a break.) After that I placed clean jelly jars inside the canning pot, filled it with water and started it on my high capacity burner. The currants went into the soup pot along with some sugar, while the new canning lids went into a sauce pan with water to simmer. My goal was to have the currants cooked down at about the same time the jars came to a boil. I lifted each jar out of the boiling water bath one at a time, filled with jam using the funnel and ladle, wiped the rim clean of any drips, added the lid and the canning jar ring, and lowered it back into the boiling water bath. When all the jam was in the jars, I cranked the heat back up to high and boiled for ten minutes. Then I turned off the heat, raised the lid and waited five more minutes. I lifted the jars out of the water bath onto a towel and listened to the lids pop as they sealed.

The process may seem complicated at first, but soon it becomes easy. I can make a batch of jam in a hour. It's the picking and cleaning the fruit that takes a long time. Visit www.freshpreserving.com for more details, or check out a canning book from the library. Try to avoid the high drama of 1950s home economics tutorials. This isn't rocket science. Just follow any recipe for guidance as to how much sugar to add, and whether or not you'll need lemon juice for acidity or pectin for thickening. The instruction sheet inside a box of powdered pectin is probably sufficient to get anyone making jam.

Freezing is even more simple than canning. Place clean fruit (such as cherries, raspberries, blueberries) in a single layer on a cookie sheet and pop it in the freezer. After a few hours, transfer the fruit to freezer bags or containers. Sliced strawberries and peaches can be placed directly into the freezer container. Make sure containers are tightly shut to avoid freezer burn. It is possible to use glass canning jars in the freezer (rather than plastic), but be sure to leave an extra inch of expansion space at the top of the jar.

Now, get out there and enjoy the fruit of the season!

Thursday, February 7, 2013

Return of the Eggs


The hens at Red Bucket Farm are laying eggs once again! After a long winter rest, the girls are back to work. Supplemental lighting has been very helpful and we will make this a regular part of our flock maintenance.

Daisy the Delaware began laying last weekend and is producing daily. She was quickly joined by Squill the Speckled Sussex. Now the Buckeye-Delaware hybrid pullets are getting into the action, too. Our Easter Egger is still finishing her molt, so her green eggs will be delayed until she is ready.

The flock is noisier and more active than they have been in months. It's still snowing outside, but spring is on the way and the chickens love the increase in day light, both supplemental and natural.

To celebrate the resurgence in egg production, tonight's menu includes tortilla espanola, a Mediterranean potato and egg omelette. Hooray for backyard hens!

Thursday, December 6, 2012

Carrots--Storage & Menu


In September and early October, I harvested a ridiculous amount of carrots---around 55 pounds. These aren't picture-perfect long slender carrots. Most of them are gnarly and twisted, which is clearly my fault for not having thinned out the seedlings properly. In fact, I intentionally planted them in bunches based on a gardening tip that I had read. Since I'm not selling produce, it doesn't matter to me what shape the carrots take. These carrots are delicious and sweet.

We've experimented with long term storage of the carrots. Our best method so far is simple. We store them in zip-lock bags inside the refrigerator. Our extra fridge is kept warmer than our primary fridge, mostly for storing root vegetables and home brewed beer and cider. It's important to prevent the carrots from dehydrating without simultaneously molding the squash and onions. Hence, we use zip-lock bags.


We've gotten creative with carrots recipes: carrot cake, braised and glazed carrots, mashed carrots with garlicky yogurt. We add carrots to soups, omelets, and stir fries. Yesterday I made sweet carrot pie, which is similar to pumpkin pie. I should probably look for that carrot jam recipe, too.  I think it's important to remember that slightly deformed vegetables taste perfectly fine and don't need to be recycled to the compost pile.

Thursday, May 24, 2012

Rhubarb Chutney


It's rhubarb time of year! If your rhubarb patch produces well, try this recipe for rhubarb chutney. We serve it with Indian food---curried veggies with naan or chapati and mango lassi. Yum! This recipe is courtesy of my friend Terri Lynn.

Rhubarb Chutney

3/8 cup sugar
3 Tbsp cider vinegar
1 Tbsp fresh minced ginger root or 1 tsp ground ginger
1 clove garlic
1/2 tsp cumin
1/4 tsp cinnamon
1/4 tsp cloves
1/8 tsp dried red pepper
1 star anise
2 cups chopped rhubarb
1/2 cup chopped red onion
1/4 cup golden raisins

Combine sugar, vinegar, ginger root, garlic, cumin, cinnamon, cloves, red pepper and star anise in a small sauce pan. Bring to a simmer over low heat, stirring occasionally, until sugar dissolves. Add rhubarb, onion and raisins. Increase heat to medium-high and cook until rhubarb is tender and mixture is thickened.

Wednesday, November 30, 2011

Heritage Turkey

It's the time of year when many of us roast a turkey or two for holiday dinners. This year we did some research and became more informed consumers before purchasing.

Did you know that turkeys sold in common grocery stores are not able to breed normally? The Broad Breasted White turkey has been cross bred to such an extreme it can no longer copulate. This breed will grow breast meat so large and heavy that the bird can't breed and sometimes can't stand on its own legs. All the eggs are artificially inseminated, and all the turkeys are raised in large commercial factories in confinement production.


The good news is that there are options available if you're willing to look. Thanks to the American Livestock Breeds Conservancy, there are a few farmers willing to keep the endangered breeds alive. Interest from the Slow Foods USA movement is raising awareness among the public.

We ordered our Thanksgiving turkey (a Bourbon Red) from a local farmer who raises meat animals in open pasture. We'll admit it was pricey----at $6/pound, it makes even a small turkey a rather large investment. We roasted our nine pound turkey outside on the grill over smoking hickory chips and stuffed with apples and rosemary. The meat was moist and delicious, and there was far more dark meat than a commercial bird. We enjoyed every bite of it, and then boiled the carcass for soup broth.

We've considered raising our own turkeys, but it's not a good idea to raise chickens and turkeys on the same property because of disease control. Besides, it's not entirely legal in my municipality. So for now, we'll pay the extra money to support our local farmers who are working hard to preserve heritage breeds.

Thursday, October 20, 2011

Making Cheese at Home

I must confess that most of the projects at Red Bucket Farm are of my own doing. I don't usually need any help coming up with another new idea. So I'm pleased to report that I'm passing along some of my inquisitiveness to the next generation. My college freshman came home on fall break with a desire to make cheese.


The first cheese project arrived before we had all the correct ingredients. Not to be daunted, my ingenious teen found a recipe using everyday grocery items--a gallon of 1% milk, a few eggs, a quart of buttermilk and a little salt correctly heated, blended, separated, strained and pressed to create a mild flavored hard cheese, photographed above and below. The recipe and instructions came from www.tammyrecipes.com.


The next project occurred after a trip to the brew shop, where we acquired vegetable rennet (in tablet form) and citric acid (a powder). My cheese maker used one gallon of whole milk, plus the rennet, citric acid and pinch of salt to create a beautiful mozzarella cheese.  After heating the milk to separate the curds from the whey, she salted and kneaded the cheese in the same manner as bread dough. It made two softball-sized balls of cheese. We ate it with homemade pasta and tomato sauce. Mild and delicious! This recipe came from www.cheesemaking.com.


What's next? Perhaps at Thanksgiving break I'll make sure we have enough goat milk to make feta cheese. The rennet tablets are in the refrigerator awaiting the next burst of cheese making activity.

Saturday, September 10, 2011

Urban Foraging


Long before I was interested in urban farming, I was familiar with the concept of urban foraging. Years ago we would harvest wild raspberries along the railroad tracks to make one delicious berry pie in the middle of July. Later, we learned to look carefully along the edges of the rails-to-trails bike paths in our region, carefully timing our bike rides to gather wild berries before the birds ate them all.

In more recent years, we've made wild grape jelly from the grapes found in the woods near our house. It was difficult to harvest the grapes, which bore the most fruit at the top of their vines. My agile teenager made those harvests possible, scrambling up trees to pick grapes.

This year my foraging efforts are more.... middle-aged. I called a neighbor and asked permission to gather the crabapples from her tree. I came home with a bucket full of crabapples, ranging in size from grape to walnut, with varying degrees of scars and bruises. I salvaged enough to make a batch of spicy crabapples, seen the photo above. The crabapples are packed in a sugar syrup with cinnamon, cloves and allspice. We'll use it as dessert over ice cream or pound cake, and perhaps we'll serve it occasionally with pork.

Meanwhile, I'm keeping my eyes open for free urban crops. What have you foraged?

Tuesday, August 23, 2011

Summer Squash


It seems like nearly every gardener has a surplus of summer squash at this time of year. Summer squash and zucchini are easy to grow and prolific. They're also easy to cook and so mild in flavor that they can fit nearly any cuisine.

Recently we've used summer squash in a variety of meals. We grated the squash and stirred into fritters with garlic-herb sauce. I made crispy Korean-style pancakes with squash and rice flour served with Asian sauces (plum sauce, hoisin sauce, sweet-n-sour sauce, miso-soy sauce). We grilled pizza with pesto, squash and cheese toppings. I baked squash gratin with eggs and wild rice. We stirred up a spicy burrito filling with grated squash. Last night we sauteed very thin peels of summer squash with chunky mushrooms in olive oil.


Other ideas include vegetable griddlecakes, breaded and fried squash sticks (like french fries only better), baked squash with herbs in parchment, risotto with squash, grilled squash (kebabs perhaps), or grilled squash in panini sandwiches.

Don't pass by the ubiquitous summer squash at this time of year---just get creative! If you need ideas, I recommend Mark Bittman's book How to Cook Everything Vegetarian.

Monday, August 15, 2011

Roasting Sweet Corn

It's sweet corn season in Wisconsin! We don't grow our own corn at Red Bucket Farm, but we take advantage of the season by visiting local farm stands. Lately, we've been buying two dozen ears of corn at a time.

Our favorite way to preserve sweet corn is simple. We soak the ears of corn--husks, silk and all--in water for 20-30 minutes, then roast whole on the grill. You can choose gas or charcoal grill, or even a campfire works nicely. Let the ears of corn cool, then remove the husks and silk. Cut the kernels off the cob with a sharp knife. Flash freeze the kernels in a thin layer on cookie sheets for an hour or two, then scrape into freezer bags. (Don't forget to compost the husks, and feed the cobs to the chickens.)

We have several bags of roasted corn waiting to be used over the winter. Roasted corn is a lovely addition to stews, soups, savory pies, gratins....the list is endless. Don't miss out on the corn this season!

Wednesday, August 10, 2011

Enjoying Eggplant

Until a year ago, I had no idea that we could grow eggplant in Wisconsin. It seems so exotic and tropical that I was surprised when a friend mentioned that his eggplant were going crazy. It's true that eggplant love the heat. Cool summers might not produce many eggplant, but this summer has been plenty warm, and the addition of my greenhouse last fall made me want to give it a try.

If the only eggplant you've ever seen are the giant purple things grown commercially in Florida, then think again. Eggplant come in a wide variety of shapes, sizes and colors. They can be white, red, green, orange and purple. They can range in size from a golf ball (ornamental) to football. Some are even striped. Almost anything that you grow at home will be more tender and tasty than the grocery store variety. The skins are softer and may not need to be peeled at all.

Since eggplant (sometimes called aubergines in cookbooks) come from all over the world, you'll find recipes for them in a wide variety of cuisines. If you haven't got many cookbooks, visit your local library to find ideas. If you love Italian food, try eggplant Parmigiana, eggplant calzones, stuffed eggplant, caponata (eggplant salad), grilled eggplant with pasta, or even eggplant on pizza. If Indian food is your thing, try eggplant with yogurt and rice, or curried eggplant puree with flatbread. Martin Yan recommends Chinese spicy fried eggplant, which is messy but delicious. Mediterranean traditions really know what to do with eggplant: spicy chickpea and eggplant stew, grilled eggplant packets, marinated eggplant, moussaka, eggplant frittata, gnocchi with eggplant, ratatouille, and bab gannouj.

I think I'd better go pick some eggplant and head to the kitchen. It all sounds good to me!

Thursday, June 30, 2011

Putting Food By

Strawberries, currants and cherries, oh my! At this time of year, we're blessed with more fruit than we can eat, so we engage in a process our great-grandmothers would have called "putting food by." Canning food is not difficult and it allows us to preserve food for use over the winter months without the extra energy required for refrigeration and freezing.

In the last couple of weeks I've canned rhubarb jam, apricot jam, balsamic strawberry jam, and cherry jam; also peach rum sauce, currant sauce and rhubarb sauce.

A few years ago I asked my friend Diana how she made all her jams and preserves. "I just buy a package of Sure-Jell and follow the directions," she replied. Her off-hand manner put me at ease. I bought a book on home preserving and a basic water canner at the farm supply store. Then I got to work. 

At first I was a little overwhelmed with getting all the steps right. But after a few batches of jam, I began to realize that it was a simple pattern to follow. Clean and slice fruit, heat it with pectin and lemon juice, add sugar and boil for a minute or two. Pour hot jam into hot canning jars and process in the water bath.

The work is sometimes hot and tedious. It takes hours to pick all those tiny currants off the vine! I recommend good music and a large fan. Allow yourself to get into the zen of food preparation. Soon your pantry will be filled with chemical-free fruits for year-round pleasure.

Thursday, June 23, 2011

Homemade Yogurt

Most of the year we enjoy a few strawberries with our yogurt, but in June we appreciate a little yogurt with our bowl of strawberries. Either way, you need to know how to make yogurt at home. It's easy and requires no special equipment. I make yogurt in quart-sized canning jars. I usually make two quarts at a time.

Measure eight cups of milk into a saucepan and heat it up to 180 degrees, or just shy of  boiling. Then cool it down to 110 degrees, which takes about an hour. At our house, we cover the saucepan with a cooling rack to keep the cats out of mischief, and stir every 15 minutes or so. When it reaches 110 degrees, stir in a tablespoon or two of yogurt. This is your "starter," similar to making sour dough bread. It makes a difference if you purchase a nice starter, perhaps a Greek yogurt.

Pour the mixture into quart canning jars. You need to keep it at about 110 degrees for several hours. Our grandmothers would have put it on the pilot light at the back of the stove top. You might use your slow cooker as a warm bath, or maybe you can keep your oven cool. I place my quart jars on an electric heating pad and then cover with a towel to hold in the heat. Hold the mixture at a warm temp for several hours, then transfer to the refrigerator where it will keep nicely for a couple of weeks.

Making yogurt at home is easy, saves money, and gives you control over the fat content of your yogurt. Enjoy!

Saturday, May 21, 2011

Seasonal Menu Changes

If you're anything like me, you enjoy the menu changes that come naturally with the change of season. Nothing tastes better than a bowl of warm soup and homemade bread on a cold November day, unless it's fresh rhubarb crisp in June. Grilled vegetables in August are heavenly.

Now that we're making a bigger effort to grow more of our own food and eat locally, it takes a bigger commitment to eat whatever is in season. Sure, we can buy grapes grown in South America and shipped thousands of miles, but it's very satisfying to choose local food instead.

Early this spring I planted spinach and swiss chard. These crops are easy to grow and have done well in the shelter of the unheated greenhouse. I'm beginning to transition to summer crops in the greenhouse, and thus it is time to harvest the spring greens. So, how many ways can you think to prepare these lovely greens?
A green leafy salad with a drizzle of olive oil and balsamic vinegar is simple and lovely. We've made more than one version of spinach pie and swiss chard gratin, and recently we enjoyed something called "greens and sweet onion pie with yeasted olive oil pastry" from Martha Rose Shulman's Mediterranean Harvest cookbook. Tonight we made pizza with pesto, swiss chard, feta and mushrooms (shown above).

So far, I haven't gotten tired of the greens. In fact, I've planted more seeds in the raised beds between rows of peas and beans. I'll harvest the leafy greens when the peas and beans get so big that they shadow the crops beneath. It's very satisfying to bring in dinner from the backyard farm.

If you have suggestions for swiss chard and spinach, we're open to new ideas.